DIY Gift Envelopes: Add a Handmade Touch to Your Gifting
Gifting is all about the thought and love behind it — and what better way to show someone you care than by wrapping your gift in a handmade envelope? Whether it’s cash, a letter, gift card, or a heartfelt note, a DIY gift envelope adds that personal charm that no store-bought option can offer.
In this blog post, you’ll learn everything you need to create beautiful, customizable envelopes from scratch using paper and a bit of creativity. From festive designs to minimalist elegance, these paper gift envelopes are perfect for birthdays, weddings, festivals, and more!
Why Make DIY Gift Envelopes?
DIY envelopes are not just a fun craft activity; they are meaningful, cost-effective, and eco-friendly.
Benefits of Making Gift Envelopes:
- Budget-friendly — made from basic supplies
- Sustainable — use recycled or leftover paper
- Customizable — match themes, colors, and occasions
- Thoughtful — shows you made an effort
- Creative — express your personal style
Whether you’re gifting money for a wedding or handing out sweets for Diwali, a DIY envelope can make the simplest gifts feel extra special.
Materials You’ll Need
The beauty of making envelopes is that you don’t need any fancy tools. Here’s what you’ll need:
Basic Supplies:
- Colored paper or patterned craft paper (A4 or square)
- Scissors
- Glue stick or double-sided tape
- Ruler and pencil
- Bone folder (optional, for sharp folds)
- Decorative items like stickers, stamps, washi tape, lace, buttons, ribbon, etc.
Optional:
- Envelopes templates or stencils (you can make your own too)
- Calligraphy pens for labeling
Standard Sizes for Gift Envelopes
You can choose the size based on what you plan to put inside:
- Money/Gift Card Envelopes – 7 x 3 inches
- Letter Envelopes – 6 x 4 inches
- Mini Note Envelopes – 3 x 2 inches
- Custom Sizes – For handmade coupons, photos, or keepsakes
How to Make a Basic DIY Gift Envelope – Step by Step
Let’s start with the classic rectangle-style money envelope.
Step 1: Choose Your Paper
Pick a thick, beautiful piece of paper — cardstock, handmade paper, printed scrapbook paper, or even recycled magazine pages. Cut it to approx. 7 x 7 inches (you can scale it as needed).
Step 2: Fold the Paper
- Place the paper patterned-side down.
- Fold the left and right edges slightly toward the center (they should overlap by about ½ inch).
- Use a glue stick or tape to seal the overlapping part, creating a tube.
Step 3: Seal the Bottom
Fold up about 1 inch from the bottom edge and glue it to close. This is the bottom flap of your envelope.
Step 4: Create the Top Flap
Fold down about 1 inch from the top edge — this is your envelope’s flap. You can keep it straight, cut a triangle shape, or round the edges with scissors for a decorative look.
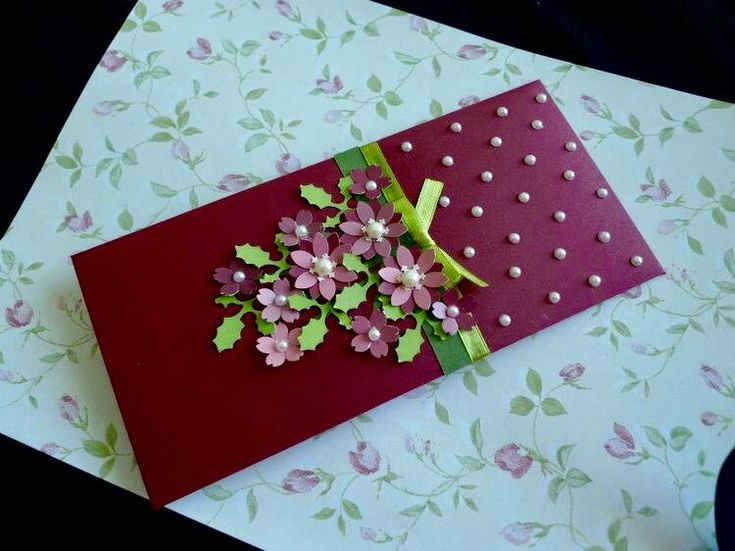
Step 5: Decorate
Now’s the time to get creative! Add:
- Stickers or die-cuts
- Washi tape borders
- Stamped designs
- Hand-drawn doodles
- Lace trim, twine, or ribbon
- Wax seals or paper buttons
Your envelope is now ready to use!
6 Creative DIY Gift Envelope Ideas
Want to take your envelopes to the next level? Try these unique styles:
1. Origami Gift Envelope
Use a square paper (6 x 6 inches). Fold it into a clever pocket-style envelope — no glue needed! Ideal for small notes or coins.
2. Button & String Closure Envelope
Use a mini paper brad or button and wrap twine around for a classic vintage look. Perfect for rustic wedding invites or handmade gifts.
3. Shaker Envelope
Add clear plastic or acetate to a cut-out window and fill with sequins, glitter, or confetti for a “shaker” effect. Kids love these!
4. Pocket Envelope with Tags
Create a tall envelope with a front pocket and insert small tags, coupons, or notes. Great for journaling or Valentine’s Day.
5. Accordion Fold Envelope
Make an envelope that opens with folds like an accordion — ideal for gifting a mini scrapbook, messages, or even photos.
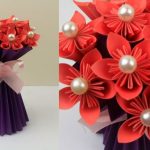
6. Festival-Themed Envelope
Decorate according to the occasion:
- Birthday – balloons, cupcakes, confetti
- Wedding – lace, florals, initials
- Diwali – diyas, gold accents, traditional motifs
- Christmas – snowflakes, Santa stamps, red & green paper
When to Use Handmade Gift Envelopes
These envelopes are perfect for:
- Cash gifts (Indian weddings, birthdays, festivals)
- Gift cards or coupons
- Love letters and appreciation notes
- Event invitations
- Handmade mini greeting cards
- Thank-you notes or blessings
They’re especially cherished during festivals like Diwali, Raksha Bandhan, Eid and Christmas where money envelopes are a tradition.
DIY Gift Envelope Activity for Kids
This is a great rainy day or holiday craft for children!
Benefits for kids:
- Boosts creativity
- Improves folding and cutting skills
- Teaches gift-giving and thoughtfulness
- Encourages recycling and sustainability
Let kids design envelopes for their teachers, friends, or family — and they’ll love adding their personal drawings or message inside ! .