DIY Paper Flower Bouquets: A Beautiful Craft That Lasts Forever
Who doesn’t love receiving flowers? They bring joy, warmth, and beauty into any space. But what if we told you that you could create your own stunning bouquet — that never wilts — using just paper?
Welcome to the colorful, creative world of paper flower bouquets! Whether you’re a craft lover, a parent looking for fun activities, or an aspiring handmade business owner, learning to make paper flower bouquets opens up a world of artful possibilities.
In this blog post, we’ll explore everything you need to know about crafting your own paper flower bouquets — from materials and techniques to design tips, occasions, and even how to package them beautifully!
Why Choose Paper Flower Bouquets?
Paper flowers are more than just a fun craft — they are versatile, sustainable, and long-lasting.
Benefits of Paper Flower Bouquets:
- Everlasting beauty – no wilting, no watering
- Eco-friendly – reuse paper or use recyclable materials
- Budget-friendly – cheaper than real flowers
- Customizable – choose your own colors and styles
- Perfect gifts or decor – for birthdays, anniversaries, baby showers, weddings, and festivals.
Materials You’ll Need
You don’t need fancy supplies to start. Here’s a list of basic tools:
Basic Materials:
- Colored craft paper (origami, tissue, crepe, or cardstock)
- Scissors
- Glue stick or hot glue gun
- Pencil and ruler
- Floral wire or pipe cleaners (for stems)
- Green floral tape or green paper (for wrapping stems)
- Optional: glitter, markers, sequins, pearls, or ribbons for decorating
Step-by-Step: How to Make a Simple Paper Flower
There are many flower styles, but let’s start with a classic rolled rose.
Rolled Paper Rose:
- Cut a Circle
Use colored craft paper and cut out a circle (about 4–6 inches in diameter). - Create a Spiral
Draw a spiral inside the circle and cut along the lines, making a coil shape. - Roll the Paper
Start rolling the paper from the outer edge inward. Use a pencil or toothpick to help you get started. - Secure with Glue
Once rolled, let the flower loosen slightly and glue the base to keep the rose shape. - Add the Stem
Attach a pipe cleaner or floral wire to the base with hot glue. Wrap it with green tape or paper for a clean finish.
Now you have a paper rose!
5. Other Paper Flower Styles to Try
Here are a few more easy and beautiful paper flower styles you can experiment with:
1. Tissue Paper Carnations
Layer 5–8 tissue paper sheets, fold accordion-style, secure in the center, and fluff out the petals.
2. Crepe Paper Peonies
Cut petals from crepe paper, stretch gently for a curved shape, and glue around a center base.
3. Origami Tulips
Use square origami paper and follow basic tulip folding instructions. Add a paper straw or skewer as the stem.
4. Cardstock Daisies
Cut out daisy-shaped petals and a yellow circle for the center. Glue them together and attach to a stick.
5. 3D Layered Flowers
Cut multiple flower shapes in different sizes, layer them with glue, and gently curl the petals outward for a 3D effect.
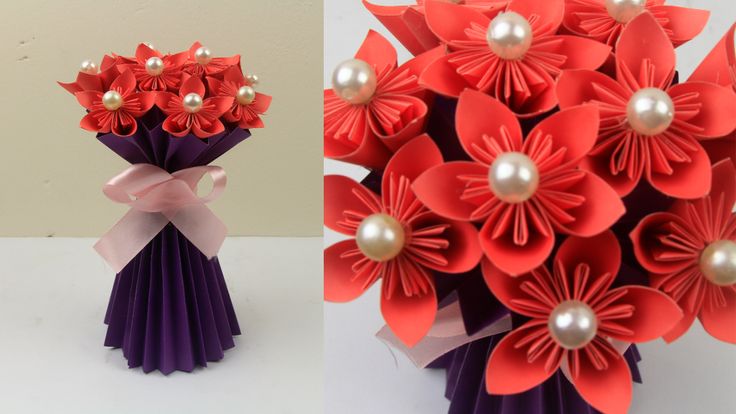
Arranging Your Paper Flower Bouquet
Now that you have a few flowers ready, it’s time to assemble your bouquet!
Step-by-Step Bouquet Assembly:
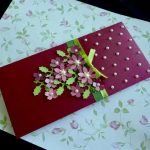
Wrap It Beautifully
Use kraft paper, colored tissue, or a doily to wrap the base. Tie a ribbon bow for an elegant finish.
Prepare the Flowers
Make 5–12 flowers (or more for a fuller look). Mix colors and styles for variety.
Wrap the Stems
Use green floral tape to wrap each stem neatly.
Bundle and Tie
Arrange the flowers in your hand or on a flat surface. Use ribbon or twine to tie the stems together.
Add Leaves (Optional)
Cut green paper leaves and glue them near the flower heads.
Occasions to Use or Gift Paper Bouquets
Paper flower bouquets are perfect for:
- Mother’s Day – A handmade bouquet from the heart
- Teacher’s Day – A creative thank-you gift
- Valentine’s Day – A lasting alternative to real roses
- Birthdays – Customize to the recipient’s favorite colors
- Weddings – As bridal bouquets, centerpieces, or décor
- Festivals – Decorate for Diwali, Eid, or Christmas
They also make great home décor pieces, especially in vases, wall frames, or table centerpieces.
Fun for All Ages: Crafting with Kids
Paper flower making is a great activity for children. It helps in:
- Building fine motor skills
- Learning about shapes and patterns
- Developing patience and focus
- Boosting creativity and self-expression
Try hosting a flower-making session during birthdays, summer camps, or classroom art projects!