Creating resin hair accessories is a delightful way to blend artistry with functionality, allowing you to craft unique pieces that reflect your personal style. Whether you’re a seasoned crafter or a beginner, this guide will walk you through the process of making resin hair accessories, offering tips, inspiration, and insights into this captivating medium.
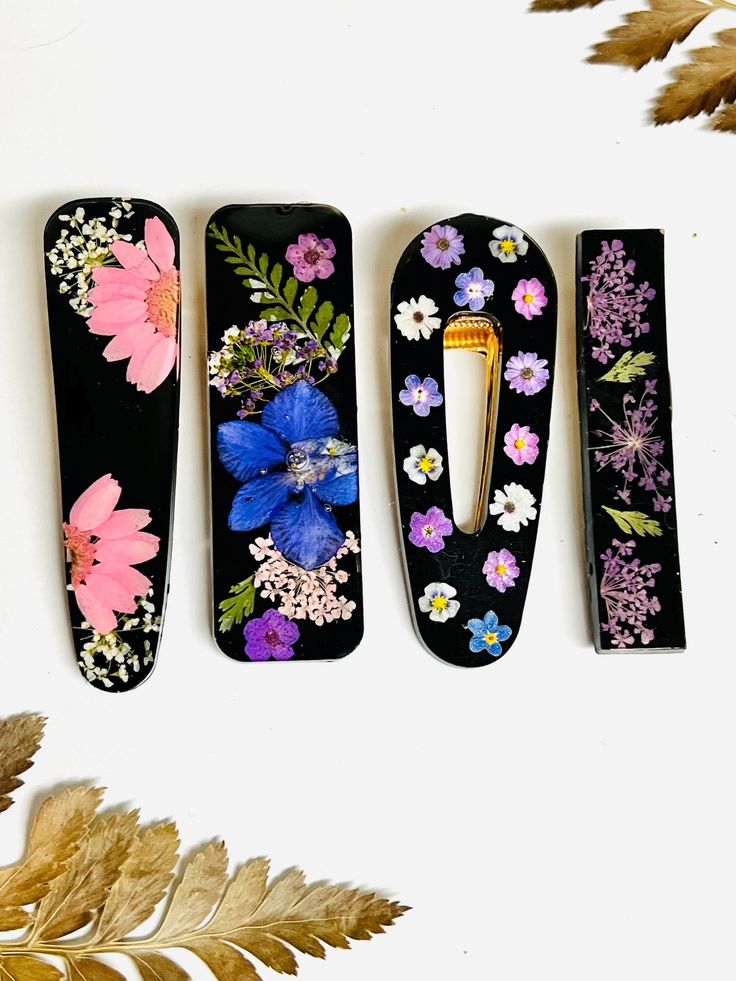
Resin hair accessories have surged in popularity due to their versatility, durability, and the endless possibilities they offer for personalization. From embedding dried flowers and glitter to incorporating meaningful charms or colors, resin allows you to craft pieces that are truly one-of-a-kind. The glossy finish and vibrant depth achieved with resin make these accessories stand out, whether worn casually or as statement pieces.
Materials and Tools Needed
Before diving into the crafting process, gather the following materials:
Epoxy Resin and Hardener: Ensure you use a high-quality, jewelry-grade resin for the best results.
Silicone Molds: Available in various shapes and sizes to suit your design preferences.
Mixing Cups and Stir Sticks: For accurately measuring and mixing the resin components.
Protective Gear: Gloves, apron, and a well-ventilated workspace are essential for safety.
Decorative Elements: Glitter, dried flowers, pigments, or small charms to embed within the resin.
Sandpaper or Polishing Tools: For finishing and smoothing the accessory edges.
Hair Clips or Barrettes: To attach your resin creations for functional use.
Strong Adhesive: Such as E6000 or super glue to secure resin pieces to hair clips.
Step-by-Step Guide to Crafting Resin Hair Accessories
1. Prepare Your Workspace
Lay down a protective covering on your work surface to catch any spills. Ensure the area is dust-free and well-ventilated.
2. Measure and Mix Resin
Following the manufacturer’s instructions, measure equal parts of resin and hardener. Mix thoroughly for the recommended time, usually around 3-5 minutes, ensuring a clear, bubble-free mixture.
3. Add Color and Embellishments
Divide the mixed resin into separate cups if using multiple colors. Add pigments, glitter, or other inclusions, stirring gently to combine.
4. Pour into Molds
Slowly pour the resin into your silicone molds, filling them to the desired level. Use a toothpick or similar tool to position any embedded items and to pop any surface bubbles
5. Curing Process
Allow the resin to cure undisturbed for the time specified by the manufacturer, typically 24-48 hours. Ensure the molds are on a level surface to prevent uneven thickness.
6. Demold and Finish
Once fully cured, gently remove the accessories from the molds. Use sandpaper or polishing tools to smooth any rough edges or surfaces, achieving a professional finish.
7. Attach to Hair Clips
Using a strong adhesive, attach your resin pieces to hair clips or barrettes. Allow the glue to dry completely before use.
Tips for Success
- Avoiding Bubbles: Mix resin slowly to minimize air bubbles. Using a heat gun or torch can help eliminate bubbles after pouring.
- Layering Effects: Pour resin in layers, allowing each to partially cure before adding the next, to create depth and dimension.
- Experimentation: Don’t be afraid to try different inclusions like fabric pieces, metallic flakes, or even small photographs for personalized touches.
Perfect for Gifting
Handmade resin hair accessories make thoughtful gifts for friends and family. Personalize them with initials, birthstones, or symbols that hold special meaning to the recipient. Packaging them in custom boxes or pouches adds an extra touch of care and presentation.
Care and Maintenance
To keep resin hair accessories looking their best:
- Cleaning: Wipe with a soft, damp cloth to remove any dirt or smudges.
- Storage: Store in a cool, dry place away from direct sunlight to prevent discoloration.
- Avoid Harsh Chemicals: Keep away from solvents or abrasive cleaners that can damage the resin surface.